Saturday 26 October 2013

Assignment 4 - Project 8, Stage 2: Experimenting with Structures, Exercise 4

For this final exercise of Project 8, we are to construct a grid of any size, then try some of the following ideas:
  • Fill in some of the spaces to create a composition of solid and open areas.
  • Work diagonally across the grid, weaving in and out of the structure with threads, string, plastic, wires etc.
  • Use the grid as a frame to enclose more intricate constructions of your own.
  • Use the grid as a base structure to weave other yarns and materials.
I thought for some time about what to use for my grid, using what I have available, as finances are tight.  I was interested in wrapping a shape with woollen yarn and felting it so that it became a rigid structure, but there's wasn't the time to experiment getting the technique right with assignment deadlines approaching. (The suggested total time for all 4 exercises in Stage 2 is 6 hours). Other ideas I had were: fusing plastic fibres into a grid by ironing between baking parchment, removing some of the slats from a bamboo mat or weaving into the punched holes of paper or Jacquard loom cards. I also considered weaving found materials into the chain link fence at the back of the house, or the metal mesh garden table and chairs, or even structures in public places.  I liked the idea of documenting how the weaving would alter over time.
 
Structures I could weave into with materials that would alter over time.
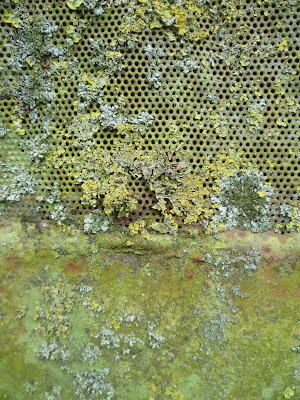
These thoughts of transformation over time led me back to my rust theme and some of the interesting rusted grid structures I've come across over the last few months.
 
Fishing equipment at Scarborough harbour
Drain cover, Mojstrana, Slovenia
Staircase at Ljubljana Castle

Antique farm equipment at Sacrewell Farm, Peterborough
Rusty moss-covered abandoned farm equipment, Sacrewell Farm
'Church' at Bears, Friesland, Netherlands
I've banked some of the ideas for another time and decided today I wanted weave into some kind of metal grid.  After a search I found a small packet of a product called MeshTex. I don't know where this came from, or what it's meant for, but it had holes large enough to pass thread through. I wound off some natural fibres from my stash - wool, cotton and silk - and soaked these in either tea or vinegar.  The plan was that after contact with metal objects, over time, the appearance of the yarns would change.
 
Yarns before soaking in tea or vinegar
Unfortunately I had no idea whether this piece of MeshTex was an iron alloy, or coated with something corrosion resistant, so it might not rust at all (would magnetic attraction be an indicator?). I held it with tongs over a flame on the hob which I suspected would change the surface at least, if not accelerate any corrosion. After a few seconds it took on the kind of rainbow oil slick effect.

Mesh-Tex approx. 10cm x 12cm after being held over flame on gas hob.
The word was stitched in vinegar soaked silk thread.
I continued, weaving freely, adding some yarns that were already rust dyed after being used to bind parcels for my previous rust prints, some brass wire that I knew would not corrode (for a contrast) and attached the washer and keys that I'd rusted already.  When I added the clips to hang, and the safety pin 'fringe' it began to take on the feel of a traditional sampler. 

'Sampler' ready for the next stage
 
Finally, I wrapped it in layers of cotton and silk fabric which again had been soaked in tea or vinegar.  Between the layers of fabric I added other smaller pieces of MeshTex and some other rusted items, imagining opening it up in a few weeks like a pass the parcel. The package was placed on a rusty bun tray inside the plastic wallet and is now in the greenhouse 'cooking'.
 
When I'd mentioned my rust project to my tutor, she told me about a visit to a textile museum in Lyon where she saw amazing cloths. Gaulish women had been buried in their clothes and their bodies excavated.  Incredible patterns were transferred onto the cloth as a result of contact with rust and other underground substances.  She has suggested I try burying some wet fabric.  The idea of burying wrapped metal objects is also mentioned by Holmes (2010) in Creative Recycling in Embroidery, which I've been reading during these exercises, and I was keen to have a go.
 
Some of my favourite rust prints have resulted from wrapping fabric around the top of a used, cleaned disposable barbecue. The metal is easy to roll up and manipulate.  I've used it a few times now so it has degenerated and is quite brittle but I thought it was strong enough to weave into and it would be interesting to see how both the weaving and the cloth would change after wrapping and burying.  Below are some of the prints I've made from it so far.
 
Tea soaked fabric wrapped around disposable barbecue grill
It was a hot day so I left it away from direct sunlight so the marks had more time to develop before it dried
Revealing the print
The marks were more subtle once I'd neutralised and dried the cloth
This later print was made with vinegar soaked cloth and left to develop over a few weeks resulting in an encrusted bright orange cloth 
As with the MeshTex weaving, I used a combination of items I'd already rusted along with new yarns soaked in vinegar or tea.  Even as I worked, the colour of the yarns began to alter as they came in contact with the rust.


I particularly liked the slightly nautical look of the threaded crusty washers, but as the weight built up, the brittle metal of the grid began to snap so the bottle tops and keys that I'd intended to weave with, I instead threaded individually onto the strongest areas.  In one corner, I tried weaving yarns in the opposite direction, but by this stage I was beginning to find the materials unpleasant to work with.  The vinegary smells were overwhelming, the grid was sharp and the metal objects were gritty and dirty and staining my hands. It was time to wrap the parcel for burial.  This is made up of the weaving and several layers of cotton and silk, which I read are materials still used for burial shrouds (or winding cloths).

Within minutes of wrapping, interesting marks were appearing on the burial shroud

I have no idea whether I should have soaked the fabric in vinegar or tea, or just left it to be affected by the substances found naturally in the soil.  Or, how long it might take for marks to develop, or how deep to bury, or near to which plants. I can only wait and see. 


After I'd dug a hole at the back of the garden, where the sunflowers have been and the soil is deep. I placed the package in.  Looking down, it felt quite disturbing as the form looked vaguely human.  Whilst I been digging I'd hit a large stone that I thought I'd use to mark the spot to dig up in a few weeks' time.  Placing the flat stone on top, I felt like I was laying a gravestone!  


Reading List
For Rust Prints: Holmes, Val (2006) Creative recycling in embroidery, London: Batsford, p23
  

Tuesday 22 October 2013

Assignment 4 - Project 8, Stage 2: Experimenting with Structures, Exercise 3

'Decide on a shape: a square, rectangle, triangle or anything else.  Use more rigid materials to form the outline of the shape so that you have a frame.  Find a way of joining the ends, so the shape is firm and stable. Think of the effect of light and space between the yarns, threads or other materials and select materials carefully looking at their particular qualities when placed against the light.  Wrap, bind, interlace or criss-cross threads between the frame.  Think carefully about how your materials meet and join to the edges of the frame.'

This exercise made me think back to a visit to Leeds Art Gallery earlier this year when I met up with some other OCA students to see a solo exhibition by Australian artist Nike Savvas.  Her colourful sculptures were made from wool laced across wooden frames.  I wished I'd understood why the show was called Liberty and Anarchy (I've been unable to find a statement of explanation) because for me the collection evoked feelings of fun, innocence and childhood. It reminded me of climbing ropes in playgrounds, the Spirograph drawing toy I used to play with, toy musical instruments and the geometric shapes and bright colours of children's building blocks.  Isn't anarchy about disruption and a lack of control?  These shapes are simple and ordered and when I came to stringing up my frame, it became clear that Savvas must have needed a great deal of planning and complex mathematical calculations to create these.
 
Nike Savvas SLIDING LADDER: Truncated icosahedron #1 2010
Wood, wool and steel
Nike Savvas SLIDING LADDER: Pyramid #2, Octagonal prism #1, Dihexagonal #1, Cube #1
2010 Wood, wood and steel 

I like how concentrated areas of colour build up as the yarn overlaps.  This is something I wanted to achieve, and I like how new frames, views and shapes are created within the original, like these star shapes in the hexagons.


Although the purple yarn below is on one plane, the interlacing has the effect of drawing your eye in to the centre of the shape as if it's a tunnel. I also like the layering of colour and the variation in opacity.
 
 
Interesting shadows were directed upon the white surfaces of the gallery floor and walls.  I wondered which other fibres Savvas had considered.  I would have liked to see colour cast on the surfaces too and imagined these shapes looking amazing strung with light emitting fibres in a dark room.   Maybe wool was chosen because of its strength and the pleasure of handling it, like I've described in the previous exercise, or maybe it's integral to the ideas behind them, which I've yet to fathom?  
 
Nike Savvas SLIDING LADDER: Yellow with blue hexagon
2012 Wood, Wool and Steel
Savvas uses what appear to be u-shaped steel fence staples on the inner edges of her frames to loop the yarn through. However, this would limit the amount of yarn you would be able to pass through, so there would have to be more knots.  Though the knots are neat, the detail is perhaps slightly distracting when you're dealing with the perfection of geometry? 


I decided that I'd begin my exercise by trying to understand more about how Savvas constructs her sculptures.  I constructed a simple wooden rectangle with nails hammered in to wind yarn around - an idea that I'd been reading about this week in a magazine my Mum used to buy: 'Golden Hands Encyclopaedia of Crafts', Part 52 (circa 1979!). String art, like Savvas's exhibition, is something else that reminded me of childhood as my Grandma used to have a picture on her wall back then - a Singaporean temple picture made from glittery threads laced onto pins hammered into a black velour background.)
 
I quickly realised that creating geometric shapes is more complicated than it appears.  For instance, how many nails on each side, how far apart should I space them and where exactly should I position the end nails? The options for ways to lace are endless. 
 
 
I concluded it was best to begin in a corner and tied on yarn to the bottom right nail.  For the first round I took the yarn over to the bottom nail on the left hand bar and wound it round, then around the top left nail, then the top nail of the right hand bar and finally back down to the nail to the left of where I began.  I continued by winding round the nail to the left of the one on the round below.  Every now and again I'd lose tension and the yarn would pop off and I'd have to work out where I'd got to.  As I continued a rounded diamond shape began to appear and once I'd covered every nail and tied the end, this is how it looked.


The yarn I chose was from a collection I've been putting together for my 'rust' theme. I selected yarns with a fairly regular diameter to fully appreciate the shapes and patterns created. I noticed that my nails were beginning to rust and thought that I could maybe accelerate the process, using vinegar or tea with salt solution, similar to how I've been making rust prints recently.  I imagined having the rust marks leaking onto, and staining, the wooden frame eventually. 


Next I attempted make contrasting patterns and increase the sense of depth by lacing layers of progressively lighter yarn.  With the second yarn I kept returning to the same corner nails and the third yellow yarn I zig-zagged across and this generated quadrilateral shapes against the layer below.


By the time I began the final lightest layer, I realised that I probably could have increased the sense of depth by considering the thickness of the yarns as well as the brightness, so I wrapped the yarn around the nail several times.  Here I was also attempting to generate a sense of perspective. 

 
Next I'll spray the frame with a vinegar and salt solution and leave it in the greenhouse inside a clear plastic wallet for a few weeks to see what will happen.  This has also given me an idea to hammer nails with heads of different thicknesses into a board in a pattern and lay fabric soaked on the solution over the top.  Perhaps I'll end up with a pointillism rust print?
 

Monday 21 October 2013

Assignment 4 - Project 8, Stage 2: Experimenting with Structures, Exercise 2

For Exercise 2, we are to make a collection of hand twisted ropes or three/four stranded plaits or braids.   Then we choose materials to interpret some surface qualities and further explore combinations to develop interesting structures, colours or textures.
 
Previously I've hand spun rope from raffia in Sue Hiley-Harris's string bag workshop and attended a braiding workshop with Ruth Gilbert where we tried some knots and techniques including kumihimo, finger knitting and using a lucet. However these workshops were more about understanding techniques rather than being experimental or making any interpretations. 
 
During Stage 1 - Exploring the Qualities of Yarn at the start of Project 8, I wound a selection of interesting yarns onto card and put them in a small plastic tub with a copy of the braid instructions as I knew this exercise would be portable enough to take on holiday with me.  I'd cut the yarns into metre lengths so I wouldn't need scissors and spent the plane journey with a safety pin attached to the knee of my jeans so I could get enough tension for braiding, whilst trying not to elbow my fellow passengers.
 
So that I could compare the structures, with each yarn I made a length of four-strand chevron braid, then a four-strand round braid and finally a four-strand flat braid. This variegated rayon wrapped gimp yarn that I chose to interpret 'smooth' shows the differences most clearly.  (I used two lengths for each strand as the yarns were quite fine.)
 
Four-strand chevron braid.  I found this braid was slightly fatter on one side and had a tendency to twist.
 
Four-strand round braid.  I found this more awkward and took more concentration to get right than the other two.
Four strand flat braid.  (The structure of this was lost on the fluffier yarns.)
 
I could imagine that by using two, three or four different colours within the braid and changing the starting positions, you could create interesting patterns along the length. Below I was interpreting 'soft'.  Chevron stripes were created by using two strands each of blue and beige and starting with two of the same colour in the outside position.
 

This round braid and chevron braid were made from fabric strips.  I padded the green and red strips to give a chunkier effect by stitching them into a tube, turning them inside out and threading through a length of yarn. You can see a pattern emerging by using one red strip to three green.


I found that braiding was a good exercise in understanding the qualities of materials as they handled quite differently.  Some were scratchy or awkward and constantly trying to escape and I felt like I needed extra hands, while others like this wool yarn felt wonderful between my fingers and behaved beautifully.    


Space dyed silk yarn.  I lined the colours up at the start and blocks of repeating colour were retained along the length
Variegated rayon yarn.  This time the colour arrangement was random. 
Combining yarns with contrasting textures 
Representing soft or smooth in braiding is relatively easy compared to other surface qualities like 'hard' or 'rough', particularly when you are limited to materials that you can carry on a plane.
 
Representing 'soft'.


I tried some paper string which felt quite rough to begin with but by braiding, it felt like I was taming it.  If I'd tied small pieces of paper or wire down the lengths so they'd stuck out, I think the effect would be much better, along with using a colour less passive than lilac. 


I tore some builder's scrim into strips but again by braiding, some of the roughness was tempered as the scratchy raw edges curled inwards.

 
These next two I felt were more successful attempts at interpreting 'hard' using deconstructed jewellery.
 
Four-stranded chevron braid to interpret 'Hard and shiny'
'Hard' - I liked how the bugle beads forced the sharp angles
 
Below I combined two stands of a soft yarn with three beaded strands to interpret 'bumpy'.

 
This was my final attempt at 'bumpy'.  Adding larger beads to one of the four strands made this structure so much more interesting.


While I was away I had the luxury of having a little time to myself so it was a great opportunity to try some observational drawing as my tutor has suggested.  In Slovenia it was easy to find a quiet outdoor spot where I could draw uninterrupted without worrying who was looking over my shoulder.  I feel very out of practise but at least I've made a start.